
"The wonderful world of ceramics: how to start working with clay"
We present a complete beginner's guide on how to get started with clay and create ceramic objects. It explains the different techniques, such as hand modeling, lathe and the use of molds. It also covers the types of clay, tools and necessary equipment, decoration techniques and the firing process. Share resources to learn more and tips for avoiding common mistakes.
Introduction:
Ceramics is an ancient art form that has been part of human life since time immemorial. The process of working with clay to create beautiful and functional objects is still a popular pastime today, and more and more people are looking to immerse themselves in this creative world. If you've always wanted to explore the wonderful world of ceramics, but don't know where to start, look no further! In this post, we will guide you in your first steps to work with clay and become a budding ceramist.
- Know the different types of clay: The first step to immerse yourself in the world of ceramics is to familiarize yourself with the different types of clay that exist. Some of the most popular include porcelain clay, stoneware clay, and terracotta clay. Each type has its own characteristics, advantages and disadvantages, so research which one suits you best according to your goals and abilities.
- Acquire the basic tools: Once you've chosen the type of clay you want to work with, it's time to get the basic tools needed to get started. Some of the essential tools include:
- A potter's wheel: This tool is fundamental to modeling and shaping clay. There are manual and electric lathes; Choose the one that best suits your needs and budget.
- Modeling tools: such as slats, chopsticks and scrapers, which will help you shape and detail your ceramic pieces.
- A roller: it will allow you to smooth and flatten the clay, especially useful for creating flat pieces such as plates and tiles.
- A sponge – to smooth and moisten the clay during the modeling process.
- Cutting tools: such as wires and knives, to cut and remove excess clay.
- Learn the basic techniques: Before you start creating your own ceramic pieces, it is essential to familiarize yourself with the basic techniques of clay modeling. These include:
- Kneading: This technique is crucial to remove air bubbles from the clay and achieve a homogeneous texture. Knead the clay with your hands, bending and tapping it repeatedly until it is soft and malleable.
- Centering: Before modeling the clay on the lathe, it is important to center it correctly. Place the clay in the center of the lathe and rotate it slowly as you press it down and inward with your hands, making sure it is firmly adhered and centered.
- Elevation and modeling: When the clay is centered on the lathe, use your hands and tools to shape it, raising it and giving it the desired shape. Practice lifting and modeling techniques until you are comfortable with the process.
- Drying and polishing: Once you have finished modeling your piece, let it dry slowly to prevent cracking. When it is dry enough but still wet (hard leather), use polishing tools and sponges to smooth and put the finishing touches on your work.
- Know the firing process: After your ceramic piece is completely dry, it's time to bake it in a special oven called a ceramic oven. Firing transforms clay into solid and durable ceramics. There are different types of ovens and cooking techniques, but the two most common methods are electric oven cooking and wood-fired oven.
- Electric oven cooking: This type of oven is the most common and easy to use. Simply place your pieces in the oven, adjust the temperature and cooking time according to the recommendations for the type of clay you are using, and wait for the oven to do its job.
- Wood-fired baking: Wood-fired cooking is a more traditional technique and can produce unique and surprising results in ceramics. This method requires more skill and experience, as you must control the temperature of the oven by adding firewood and regulating the air flow.
- Decorate and glaze your pieces: Once your pieces have been baked, you can give them a final touch with decoration and enamelling. Enamel is a vitrifiable substance that is applied to ceramics to give it color, shine and a waterproof surface. There is a wide variety of enamels and decoration techniques available, allowing you to customize your creations and give them your own style.
- Enamel application: You can apply the enamel with brushes, sprays or even immersing the piece directly into the enamel. Be sure to follow the enamel manufacturer's instructions for best results.
- Second firing: After applying the enamel, your pieces will need a second firing so that the enamel melts and adheres correctly to the ceramic. This cooking is done at a lower temperature than the first and is known as "enamel cooking" or "ripening cooking".
- Continue to learn and experiment: Pottery is an art that requires practice and patience. Don't be discouraged if your first few pieces aren't perfect. He continues to learn and experiment with new techniques, clay types and enamels. Don't hesitate to take classes, join a group of ceramists, or search online for resources to further hone your skills.
conclusion:
Delving into the wonderful world of ceramics can be a rewarding and therapeutic experience. By working with clay, you will not only be able to create unique and beautiful objects, but you will also have the opportunity to express yourself and connect with a millenary artistic tradition. If you follow these tips and continue to practice and learn, you'll soon be creating ceramic pieces you'll be proud of! Good luck on your ceramic journey and enjoy every step in the creation process!

Bluey Maletin Pinturas para Niños - Set de Arte para Niños, Lápices de Colores, Crayones, Suministros de Arte Regalos para Niños
17,84 € (as of 23 de October de 2024 04:24 GMT +00:00 - More infoProduct prices and availability are accurate as of the date/time indicated and are subject to change. Any price and availability information displayed on [relevant Amazon Site(s), as applicable] at the time of purchase will apply to the purchase of this product.)

BONNYCO Animales de Juguete con 16 Figuras para Pintar Manualidades Niños con Brillo en la Oscuridad | Juguetes Niños 3 4 5 6 7 8 9 10 Años Regalos para niños Cumpleaños, Navidad, Comunion
14,99 € (as of 23 de October de 2024 04:24 GMT +00:00 - More infoProduct prices and availability are accurate as of the date/time indicated and are subject to change. Any price and availability information displayed on [relevant Amazon Site(s), as applicable] at the time of purchase will apply to the purchase of this product.)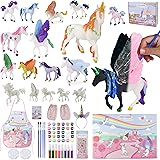
BONNYCO Unicornios para Niñas Figuras para Pintar Kit con 18 Unicornios Manualidades Niñas con Brillo en la Oscuridad | Juguetes Niña 3 4 5 6 7 8 9 10 Años Regalos Niña, Cumpleaños, Navidad
12,39 € (as of 23 de October de 2024 04:24 GMT +00:00 - More infoProduct prices and availability are accurate as of the date/time indicated and are subject to change. Any price and availability information displayed on [relevant Amazon Site(s), as applicable] at the time of purchase will apply to the purchase of this product.)
Character Options SIMBRIX Theme Pack JARDÍN Mágico con 1500+ Brix
28,90 € (as of 23 de October de 2024 04:24 GMT +00:00 - More infoProduct prices and availability are accurate as of the date/time indicated and are subject to change. Any price and availability information displayed on [relevant Amazon Site(s), as applicable] at the time of purchase will apply to the purchase of this product.)
Conchas que Brillan en la Oscuridad Pintar Manualidades para Niños, Set de Manualidades Niños 4 5 6 8 10 Años, DIY Glow in the Dark Pintura Niñas Juguetes, Regalos para Niña 4 5 6 7 8 9 10 Años
17,99 € (as of 23 de October de 2024 04:24 GMT +00:00 - More infoProduct prices and availability are accurate as of the date/time indicated and are subject to change. Any price and availability information displayed on [relevant Amazon Site(s), as applicable] at the time of purchase will apply to the purchase of this product.)
CutteeyFyry Maletin Pintura NiñOs De 3 A 9 AñOs,Dinosaurios Maletin De Pinturas Para Juego,Pasteles Al óLeo, Crayones, LáPices De Colores, Regalos De Dinosaurios Para Juego De 3-9 AñOs
16,98 € (as of 23 de October de 2024 04:24 GMT +00:00 - More infoProduct prices and availability are accurate as of the date/time indicated and are subject to change. Any price and availability information displayed on [relevant Amazon Site(s), as applicable] at the time of purchase will apply to the purchase of this product.)
CutteeyFyry Maletin Pintura NiñOs De 3 A 9 AñOs,Unicornio Maletin De Pinturas Para NiñAs,Pasteles Al óLeo, Crayones, LáPices De Colores, Regalos De Unicornio Para NiñAs De 3-9 AñOs
16,98 € (as of 23 de October de 2024 04:24 GMT +00:00 - More infoProduct prices and availability are accurate as of the date/time indicated and are subject to change. Any price and availability information displayed on [relevant Amazon Site(s), as applicable] at the time of purchase will apply to the purchase of this product.)
Dazhtu Piedras Pintar Juegos para Niños, Piedras que brillan Manualidades DIY Kit Juegos de Manualidades para Niños Creativos Pintura con 24 colores para Niño Niña de Regalos 3-12 Años
10,99 € (as of 23 de October de 2024 04:24 GMT +00:00 - More infoProduct prices and availability are accurate as of the date/time indicated and are subject to change. Any price and availability information displayed on [relevant Amazon Site(s), as applicable] at the time of purchase will apply to the purchase of this product.)
Decoracion Halloween Casa Interior Multipack Figuras de Yeso para Pintar Kit Manualidades de Halloween para Niños (Pack de 1)
15,99 € (as of 23 de October de 2024 04:24 GMT +00:00 - More infoProduct prices and availability are accurate as of the date/time indicated and are subject to change. Any price and availability information displayed on [relevant Amazon Site(s), as applicable] at the time of purchase will apply to the purchase of this product.)
Disney Princesas Maletin Pinturas para Niñas Estuche Colores Niña Completo con Rotuladores Lápices de Colores y Pegatinas Maletin Actividades Niñas para Colorear
20,49 € (as of 23 de October de 2024 04:24 GMT +00:00 - More infoProduct prices and availability are accurate as of the date/time indicated and are subject to change. Any price and availability information displayed on [relevant Amazon Site(s), as applicable] at the time of purchase will apply to the purchase of this product.)
DIY-LAOESE Kit de Lámpara de Pelota de Fútbol, Juegos, Pintar, Juguete Creativo, Manualidades, regalos para niños 3-12 años
23,52 € (as of 23 de October de 2024 04:24 GMT +00:00 - More infoProduct prices and availability are accurate as of the date/time indicated and are subject to change. Any price and availability information displayed on [relevant Amazon Site(s), as applicable] at the time of purchase will apply to the purchase of this product.)
DIY-LAOESE Kit de Pintura Lámpara, Luz Nocturna de Gato 3D, Arte Kits de Manualidades Niñas, Juegos y Juguetes de Pintura para Niños 4-12, Regalo Cumpleaños para Niñas 6 7 8 9 10 11 12 Años
16,52 € (as of 23 de October de 2024 04:24 GMT +00:00 - More infoProduct prices and availability are accurate as of the date/time indicated and are subject to change. Any price and availability information displayed on [relevant Amazon Site(s), as applicable] at the time of purchase will apply to the purchase of this product.)